
If you have already understood the basics behind Microsoft Fabric, then this is time to get started with it. If not, then no worries. You can check my introductory blog on Microsoft Fabric and familiarize yourself with it and come back to this blog as a next step. Let’s get started.
Enable Microsoft Fabric
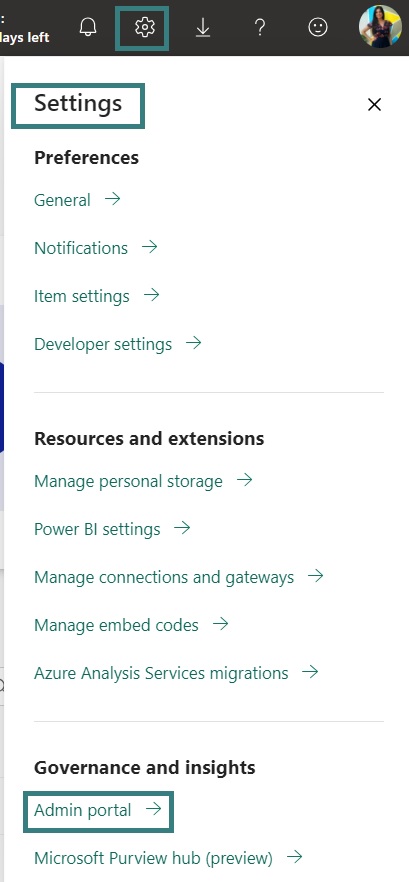
In order to try the end-to-end capabilities of Microsoft Fabric, it needs to be enabled within your organization’s tenant. Currently Microsoft is giving free Fabric trial for 60 days to it’s users, therefore it is the best time to make use of this and learn about Fabric in practice. To enable Fabric for your organization, you have to be one of these – Fabric admin, Power Platform admin or Microsoft 365 admin. If not then you may need help from your IT department to get this enabled. If you have one of the admin accesses mentioned earlier, then you can easily enable Fabric in the Power BI Service.
Navigate to Admin Portal in the Power BI Service and enable Fabric under the Tenant Settings.
Next under Admin Settings, you can enable Fabric Preview and Apply the updates.
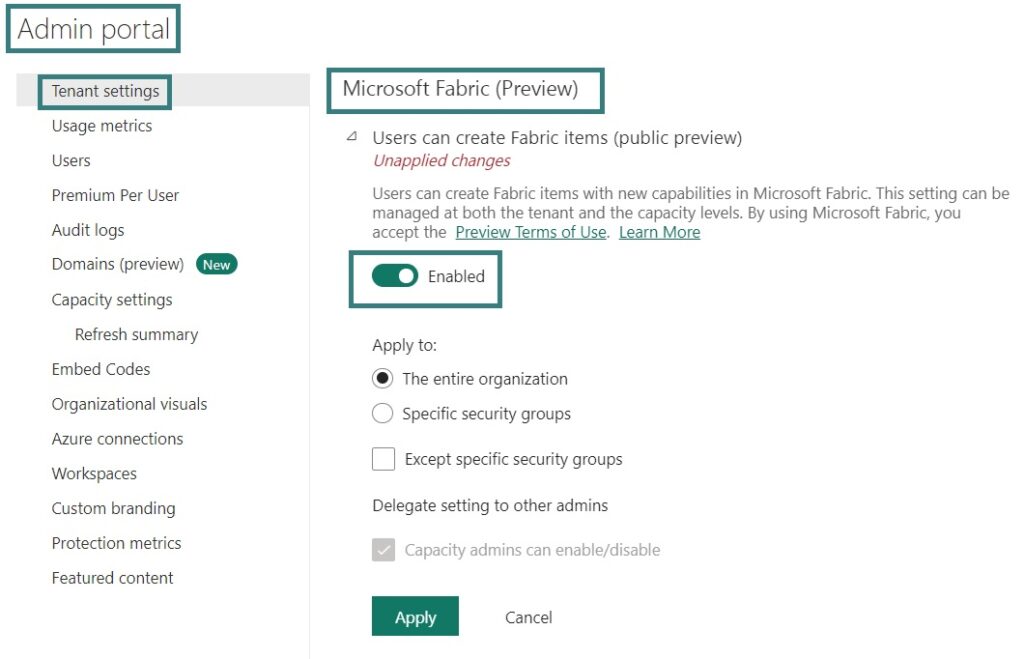
Fabric can be enabled for the entire organization or for specific security groups. Choose as per you want to enable it for users within the Power BI tenant. Once the Fabric is enabled, it takes around 15 minutes, till you start seeing Fabric elements in your Power BI tenant.
Navigate to the bottom-left of your Power BI Service Homepage –> Click on the Power BI icon –> Microsoft Fabric
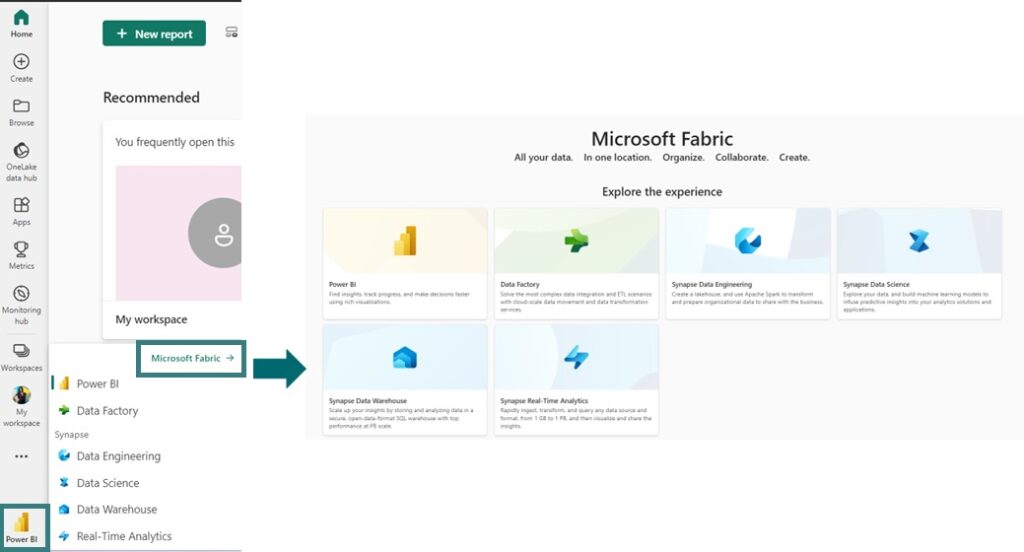
You will be navigated to a new page and you will start seeing the Microsoft Fabric artifacts.
- Power BI
- Data Factory
- Synapse Data Engineering
- Synapse Data Science
- Synapse Data Warehouse
- Synapse Real Time Analytics
- Data Activator (soon to be coming)
We have successfully enabled Microsoft Fabric in the Power BI tenant. It is now very important to understand here is that – all the Fabric items are stored in OneLake (as seen in the previous blog) and accessed by a Fabric Workspace. In order to use Fabric, we need a workspace which has Fabric enabled on it. Therefore, the first thing we do here is create a workspace which has Fabric enabled.
Create Fabric Enabled Workspace
Let’s create a new workspace following the steps mentioned below:
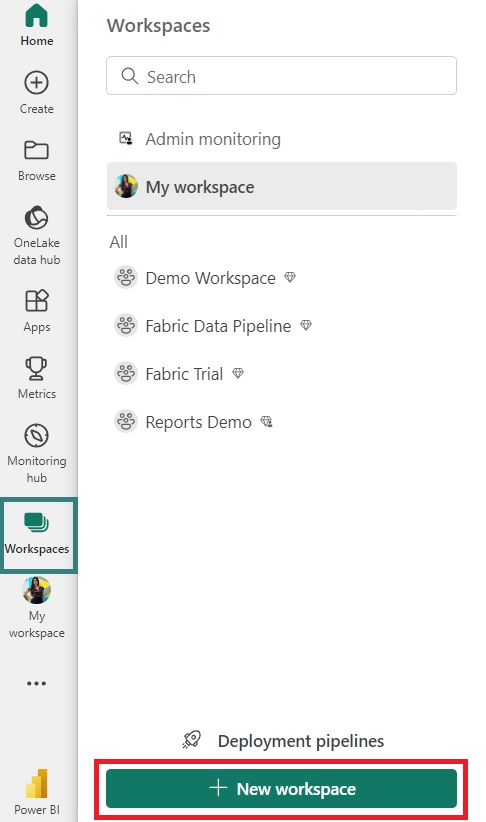
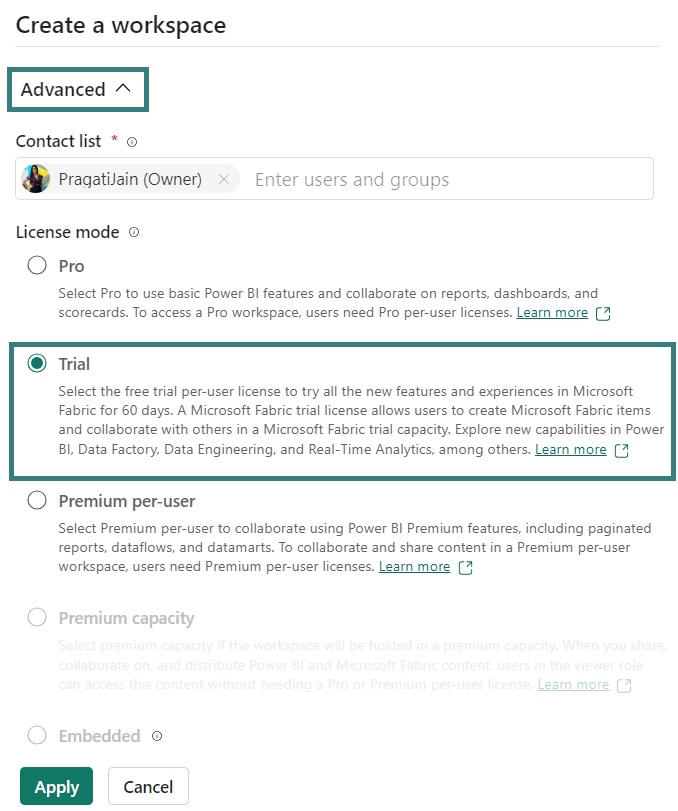
Once we hit the New Workspace, a new window opens on the right. Give a name to your workspace and click on the Advanced option, as we need to enable Fabric on this workspace. After clicking Advanced option a new section options, which shows all the licensing options. We go ahead and choose Trial as this is the Fabric trial we enabled and hit Apply.
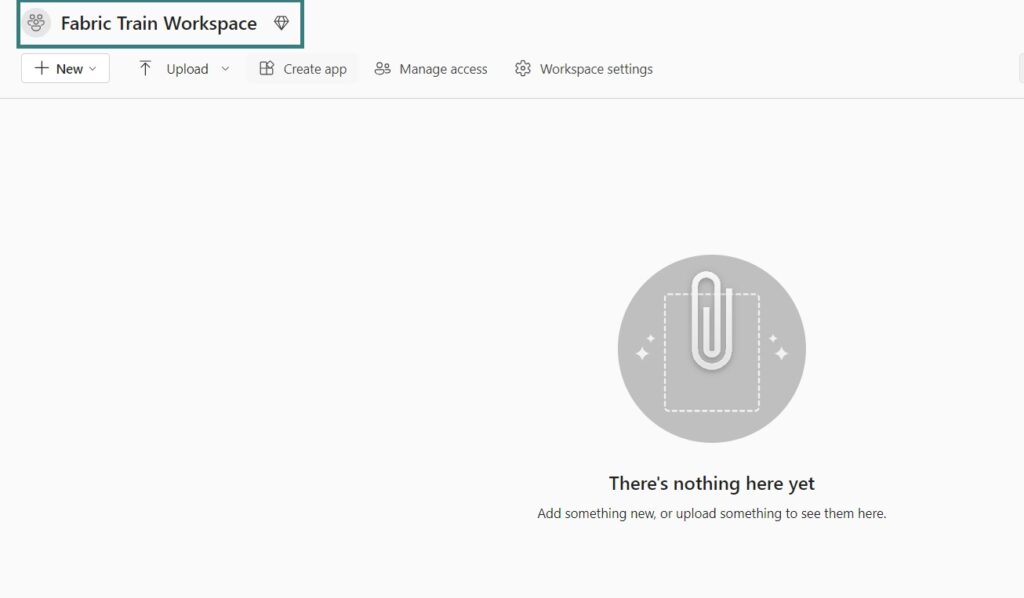
The Fabric enabled Power Bi workspace is created successfully. It is currently empty as we haven’t created anything in this workspace yet.
So this is how you can easily enable Fabric within your Power BI tenant and create a Fabric enabled workspace. In the next blog we will start with adding elements to this workspace and see some Fabric in action. Till then stay tuned.
Happy Fabric Learning!
Pragati
Nice mam.